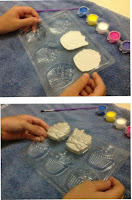
Do check out the simple step-by-step guide for this fun activity. It's a worthwhile hobby that you and the kids can enjoy over and over.
The toy was created by 4M, and the packaging says it's for children aged 3 and up. The set comes with two packets of plaster, a plastic mould (not shown here), a strip of acrylic paint, one paintbrush, and attachments for badges and magnets.
Aside from the materials included in the set, you will need:
- a plastic mixing bowl
- a mixing spoon or popsicle stick
- some cold water
- newspapers and rags
Here are the basic steps:
1. Put a small amount of plaster into your mixing bowl. We used about 2 tablespoons to test it out. Mix in about 20 ml of cold water and stir immediately with your popsicle stick.
2. The plaster begins to set almost immediately, so when the mixture has been well stirred with no lumps, pour it into the plastic mould.
3. Wiggle the mold a little to ensure the plaster reaches all crevices of the plastic.'
4. Allow the plaster to set by placing the mould in a dry place. The packaging says it takes about 30 minutes to 1 hour for it to harden.
5. When the plaster has hardened, carefully flip it over onto a rag or towel. The cupcakes will easily unstick from the mould and are now ready to paint.
6. When preparing for painting, ensure that your work surface is covered in newspapers or scratch paper. Some supervision is needed so that clothing won't be stained.
7. Use a cup with a small amount of water for wetting the paintbrushes prior to dipping into the paint.
8. After painting, allow the cupcakes to dry for at least 2 hours.
9. When the cupcakes and the paint are completely dry, you can attach magnets at the back using adhesive (included in the package).
10. There is also an option for making badges or pins, but those have to be placed on the wet plaster right after it has been poured into the mould.
Shown on the right are the proud works of our two young artists.
Our toddler painted her cupcake completely in pink :-)
Our 7 year old mixed some colors and the result looked great.
We hope you liked our tutorial! Thanks for checking us out.
 |
| We love our cupcakes! |


No comments:
Post a Comment